Automating Sql Server Backups to Azure Blob Storage
This guide outlines how to automate SQL Server backups to Azure Blob Storage. This is a good way to automate backups where local storage is limited or not available.
This guide outlines how to automate SQL Server backups to Azure Blob Storage. This guide will use a SAS token to authenticate to Azure Blob Storage. This is a good way to automate backups where local storage is limited or not available.
Monitoring is important to quickly identify issues with backups. Monitoring does not replace testing backups, but it can help identify issues before they become a problem. If the server is in Zabbix, you can monitor the SQL backup with this solution
.
Go to the Azure Portal
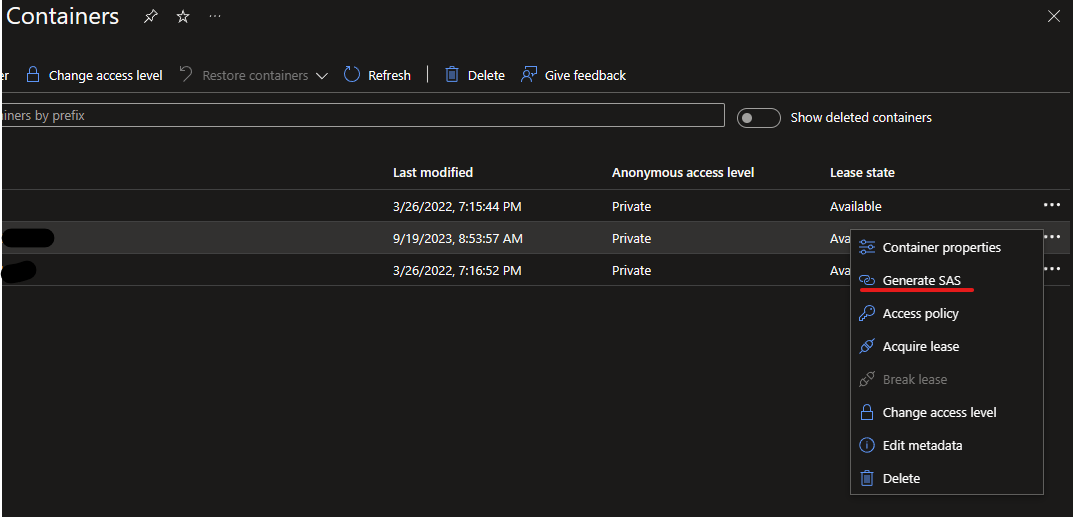
and navigate to the Storage Account you want to use. In the Containers view, select (or create) the container you want to use and click Generate SAS. Set the Start and End dates to the desired time frame. Set all permissions except Immutable storage and click Generate SAS and connection string.
Copy the Blob SAS token. Also take note of the Storage account name and Container name.
Note: There should be brackets around URL and single quotes around the values IDENTITY and SECRET. The value of IDENTITY must be 'SHARED ACCESS SIGNATURE'.
The script must be run on master for each instance. The script creates a folder with today’s date (YYYY-MM-DD) and splits the BAK files into 3. This is because for large database files fail if there is only 1 BAK file. If you run SQL Express, you must remove the COMPRESSION flag at the end of the backup command (line: 72).
The script is stored under Stored Procedures in master.
-- Copyright Microsoft Corporation. All Rights Reserved.
-- This code released under the terms of the
-- Microsoft Public License (MS-PL, http://opensource.org/licenses/ms-pl.html.)
USE[master]GO/****** Object: StoredProcedure [dbo].[sp_BackupDatabases] ******/SETANSI_NULLSONGOSETQUOTED_IDENTIFIERONGO-- =============================================
-- Author: Microsoft
-- Create date: 2010-02-06
-- Description: Backup Databases for SQLExpress
-- Parameter1: databaseName
-- Parameter2: backup url, ex: storageaccount.file.core.windows.net
-- Parameter3: backup storage blob, ex: backup-blob01
-- =============================================
CREATEPROCEDURE[dbo].[sp_BackupDatabases]@databaseNamesysname=null,@backupStorageAccountnvarchar(200),@backupStorageBlobnvarchar(200)ASSETNOCOUNTON;DECLARE@DBsTABLE(IDintIDENTITYPRIMARYKEY,DBNAMEnvarchar(500))-- Pick out only databases which are online in case ALL databases are chosen to be backed up
-- If specific database is chosen to be backed up only pick that out from @DBs
INSERTINTO@DBs(DBNAME)SELECTNameFROMmaster.sys.databaseswherestate=0ANDname=ISNULL(@DatabaseName,name)ORDERBYName-- Filter out databases which do not need to backed up
DELETE@DBswhereDBNAMEIN('tempdb')-- Declare variables
DECLARE@BackupNamevarchar(100)DECLARE@BackupFile1varchar(300)DECLARE@BackupFile2varchar(300)DECLARE@BackupFile3varchar(300)DECLARE@DBNAMEvarchar(300)DECLARE@sqlCommandNVARCHAR(1000)DECLARE@dateTimeNVARCHAR(20)DECLARE@dateOnlyNVARCHAR(20)DECLARE@Loopint-- Loop through the databases one by one
SELECT@Loop=min(ID)FROM@DBsWHILE@LoopISNOTNULLBEGIN-- Database Names have to be in [dbname] format since some have - or _ in their name
SET@DBNAME='['+(SELECTDBNAMEFROM@DBsWHEREID=@Loop)+']'-- Set the current date and time n yyyyhhmmss format
SET@dateTime=REPLACE(CONVERT(VARCHAR,GETDATE(),101),'/','')+'_'+REPLACE(CONVERT(VARCHAR,GETDATE(),108),':','')SET@dateOnly=CONVERT(VARCHAR,GETDATE(),23)-- Create backup filename in path\filename.extension format for full,diff and log backups
SET@BackupFile1='https://'+@backupStorageAccount+'/'+@backupStorageBlob+'/'+@dateOnly+'/'+REPLACE(REPLACE(@DBNAME,'[',''),']','')+'_FULL_'+@dateTime+'-1.BAK'SET@BackupFile2='https://'+@backupStorageAccount+'/'+@backupStorageBlob+'/'+@dateOnly+'/'+REPLACE(REPLACE(@DBNAME,'[',''),']','')+'_FULL_'+@dateTime+'-2.BAK'SET@BackupFile3='https://'+@backupStorageAccount+'/'+@backupStorageBlob+'/'+@dateOnly+'/'+REPLACE(REPLACE(@DBNAME,'[',''),']','')+'_FULL_'+@dateTime+'-3.BAK'-- Provide the backup a name for storing in the media
SET@BackupName=REPLACE(REPLACE(@DBNAME,'[',''),']','')+' full backup for '+@dateTime-- Generate the dynamic SQL command to be executed
SET@sqlCommand='BACKUP DATABASE '+@DBNAME+' TO URL = N'''+@BackupFile1+''', URL = N'''+@BackupFile2+''', URL = N'''+@BackupFile3+''' WITH COPY_ONLY, NOFORMAT, NOINIT, NAME= '''+@BackupName+''', NOSKIP, NOREWIND, NOUNLOAD, COMPRESSION'-- Execute the generated SQL command
EXEC(@sqlCommand)-- Goto the next database
SELECT@Loop=min(ID)FROM@DBswhereID>@LoopEND
Open SMSS and connect to the SQL instance you want to backup.
In SMSS, navigate to the SQL instance you want to backup. Right click on SQL Server Agent and select New -> Job. Give the job a name and click Steps. Click New and give the step a name. Select Transact-SQL script (T-SQL) as the type and paste the following into the command box, replacing and with the values from the SAS token:
Adjust the agent job properties and schedule as desired. Click OK to save the job.
Alternatively, you can run the script with Task Scheduler. Create a new backup_sql.cmd file with the following contents, replacing and with the values from the SAS token:
Then use Task Scheduler to run the script as desired. This requires the user running the scheduled task to have access to SQL Server.
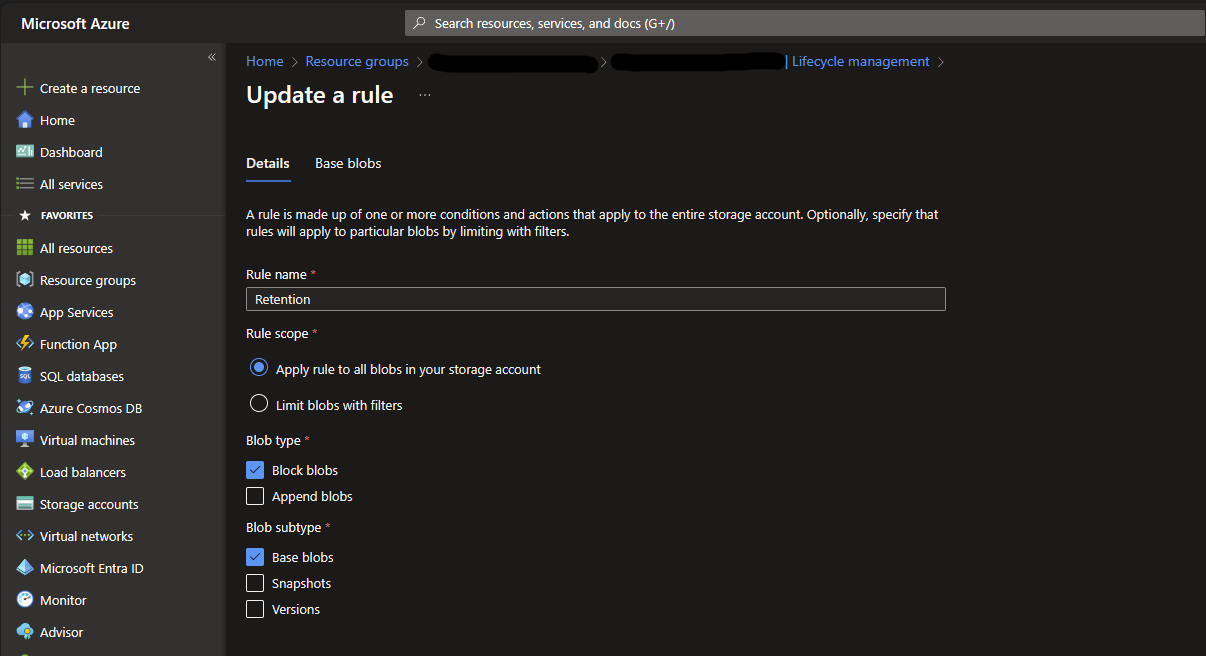
Step 5: Adjust Retention and Lifecycle Management#
Back to the Storage Account in Azure Portal, go to Lifecycle Management. If this Storage Account is only used for this SQL backup, you may use Apply rule to all blobs in your storage account, otherwise you may want to use Limit blobs with filters.
Set Blob type to Block blob and Blob subtype to Base blobs. Click Next.
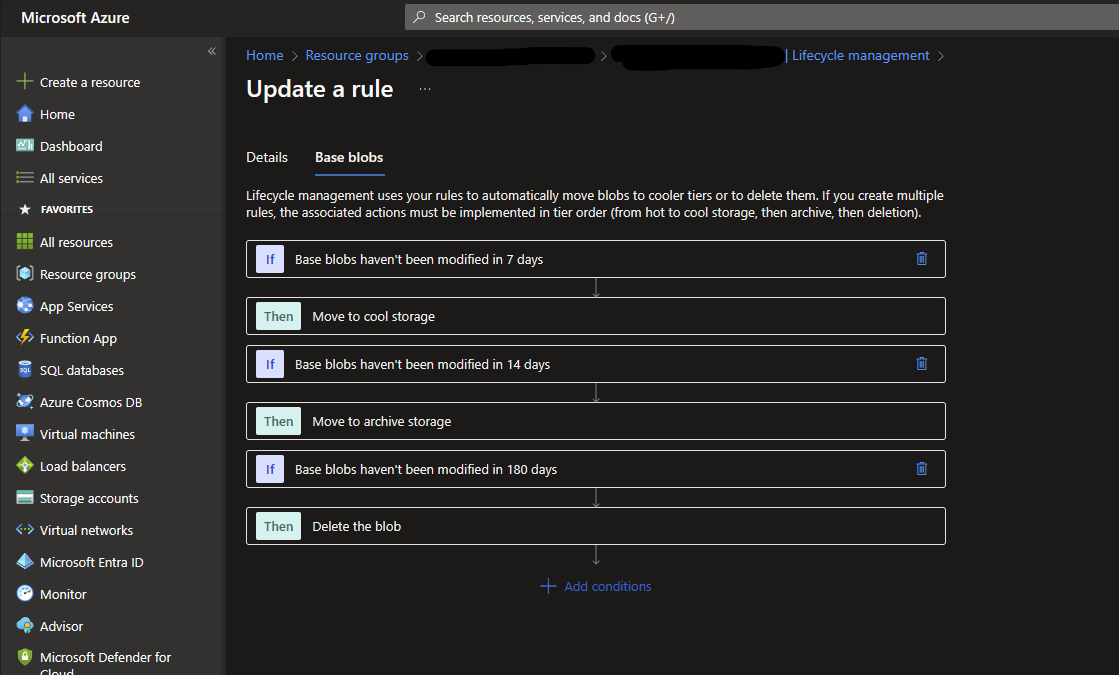
Add conditions as desired. Data stored in Archive storage is cheaper to store, but more expensive to access. You should therefore only move to Archive storage if you are unlikely to need to restore the data. Click Add to save the policy.